Showing posts with label DIY. Show all posts

Monday, January 14, 2013

Baby bookshelves

Mr. B built the baby some new shelves. After I requested some of course, he would prefer to spend every minute in the garage working on the car project. Good thing these shelves took hardly anytime for him at all!
I got the idea for these narrow picture gallery style shelves for the nursery after searching for it on pinterest. I started shopping on Amazon for shelves like this to purchase. They were around $25 -$35 a shelf, plus shipping!! I was not thrilled about that. The total cost in materials was $22.00 in molding, screws and anchors. He made me 3, 4 foot shelves.

We didn't want to make an entire gallery wall like the inspiration photo below, although I love it, it feels busy for us.
Inspiration


Mr. B built the shelves in about 20 minutes. They are constructed out of baseboard molding pieces, primed MDF 2"x 1" and 3"x 1",  also 1/4 round in 1/2" out of pine.


I then painted the shelves, with two coats of some paint we had laying around from when we bought our home. Its Behr paint and primer in one, in "Cotton Whisper".


Here they are installed up on the wall parallel with the window wall. 


The best thing about these shelves is the low profile they have. They work great for areas that you can't afford to fit an entire deep bookshelf. Also they display the adorable children's books so much better than a regular bookshelf

We have added a few of our own children's books from way back when.... I also added a couple pictures of Mr. B when he was younger and a couple toys.


I loved being read to as a child, and I cannot wait to share that experience with our daughter. It leaves such a lasting impression on young children.

I kept my favorite books in such great condition too, even though for years I read them nightly they hardly look used. I've had fun adding some great new books to our baby registry, hope she loves them all!


Saturday, January 12, 2013

Nursery Art: 1 down, 2 to go

I posted last week about how I plan to paint the 3 canvases I have had laying around, and use them as art for the nursery. After all we do need something fun and cute to fill up the walls until she is painting for herself!

I have another project going on in the meantime (I'll post when it's done), I only got one painting done this week, but it's my favorite.
The Owls!


Here is a close up of the little guys.  

I plan to paint a Tree on the next canvas, and the last one will be her name. That one may have to wait until she is born, as we haven't chosen one yet! I just hope I have time to paint it after she is born...

I am excited about all the joys our little one will bring, but I am not oblivious to the reality that it will be hard. This video I found, takes the burdens of motherhood to a hilarious level. Hope you enjoy it!


Sunday, August 12, 2012

New Old Project

Mr. B and I bought ourselves a New (Old) car!

We decided we needed a new project, since our house is pretty much where we want it for now. Of course we will probably be working on changing a few things around our home, but this little beauty is our number one priority for now!


First things first, we needed to clear out some space in our 2 car garage that we have been using as a one car for too long.
4d5e1b1c

Well in the heat we have been having Mr. B and I decided to get up early Saturday Morning and start while it was a cool 75...
A few hours of lifting and organizing really paid off.
Photobucket

Yay!! They fit :) We knew they would, and now our little Cheri has a safe parking spot.
22bcb9f8

Photobucket

I had planned on doing a photo shoot of her, and us all dressed up in 1950's attire, but we hit a few road bumps Friday afternoon. First off its bloody hot, like 104 and I just didn't feel like dressing up in much of anything. Then...we were driving it and the back wheel almost fell off. Yeah, that happened, so we took her home and inspected the under carriage a little closer, she has a bit of rust people!! I think we may tear her apart sooner than later.

Photobucket


I hope to be able to photograph and blog about our project as she progresses. Mr. B has big plans for her, and I just can't wait!
Photobucket


Saturday, March 24, 2012

Fake Chocolate! A craft.

I know that title sounds so wrong, I agree but sometimes for decor purposes we need to make fake things that look edible things.

Easter is right around the corner and I love to put out candy eggs, jelly beans, & chocolate bunnies. Well this year that just isn't an option. We have had rainy weekends lately and the ants are venturing in with a purpose. A purpose to find any tiny little crumb that resembles something edible (or not) and charge it! So I have been doing a lot of cleaning lately, and ant proofing everything in our home.
This ant attack has actually had a silver lining, I am getting quite organized and my cupboard is looking better than ever. Giant tupperware is my friend, giant tupperware is my friend!

Okay my problems aside, here is my fast and easy Easter craft.
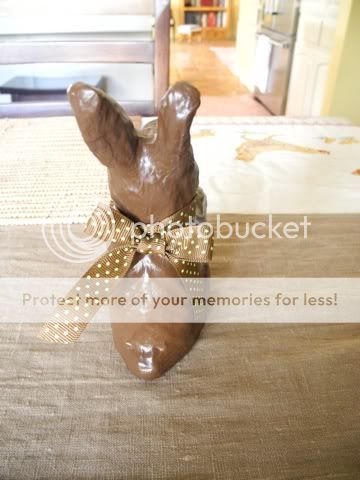
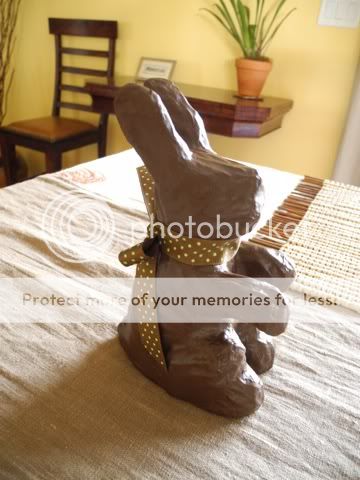
Faux Chocolate Bunnies!

I went to the local craft store and picked up these cheap paper mache bunnies, for $3 each. I had the acrylic paint, the satin clear coat and grosgrain ribbon already in my craft stash.
Other materials used, • small paint brush •scissors •that's it!


All I needed to do was to make them look like this!
Easy.


Two coats of acrylic paint in "Dark Chocolate" I'm not kidding that was the actual name of the color.


They were looking just like the shade of delicious chocolate, but slightly too dull in finish.


I gave them a light spray with satin clear coat to make them appear like shiny molded tempered chocolate bunnies.


Dressed them up with a grosgrain bow around their necks, and put them on out table.


Mr. B will be headed up to the attic to fetch the rest of the Easter decor tomorrow so I can put it out tomorrow. It's supposed to be a rainy Sunday, so I will have fun putting it all out.
These guys actually are quite believable, every time I walk by I am tempted to bite their ears off.


I got the idea from my idol Martha, but her version seemed way more time consuming and the materials would certainly cost much more than my project.

Saturday, January 14, 2012

Solo updates around here

I woke up this morning with a plan, a plan to fix a few things that were just not right around here. Two problem areas to be exact.
1.) Our Utility closet disaster area.
2.) The Guest Bath broken towel holder in the tub. (yeah I know, I'll explain below)

Normally I involve Mr. B in these plans, well lets be frank, he usually does the majority of the work as I take on all creative control.
This time I was working solo. Mr. B has been tied up rebuilding a vehicle in our garage and that's a top priority. While I had elaborate ideas of how perfect my 2 projects could be in my head, I set out to town for supplies I quickly realized something.
I could fix them the easy way, or the time consuming and expensive way which happens to be the only way to achieve what my mind had made up.
Well guess what. I went cheap and easy folks, and I finished the projects in less than a couple hours and I am okay with that.

Sure they aren't quite what I wanted, but as a very smart and realistic woman once told me, "it's good 'nuff"

Project # 1. Utility closet.
Here is my very shameful and horrifying broom/utility closet, before.

Ahhhhh!!!


It's really bad, totally unorganized but very much used on a daily basis. This small cluttered closet is our broom storage, dog food closet, grocery bag hanging area, shoe storage, and it holds my rolling case full of tools and crafting supplies. Unfortunately the plan I had of turning it into a beautifully looking custom built-in storage area didn't quite make it in my budget for today.
So I turned this.


To this with a trip to the hardware store, and the local thrift store.


I paid $8.00 for this really heavy duty broom holder bracket. It keeps my long handled cleaning devices up and away from the floor, and therefore in a nicely sectioned off area in the closet. No more flopping around all over the ground.


I moved our hook rack to the back of the closet and much higher up, so it stores all of my reusable grocery bags up high, where there used to be a useless tiny shelf that I couldn't reach.


I also picked up this small wooded shelf and basket from a thrift store (that supports our local humane society) I set the rolling cart on top of it, along with Baxter's large ant proof food bin. On the bottom shelf I placed the basket that I am using to store smaller shoes and my old Ugg boots are just to the left. This is really helpful to have a place we can neatly store our "not so nice shoes" and keep them out of sight.




Not that pretty, but it's organized and it works so I'm happy.

Project # 2.
The guest bath broken towel rack tile things.
Have you ever been in a bath with a towel rack in it? No? Neither had I until we bought our home with one! The guest bathroom had a horizontal bar in it, kind of like the ones you could pull on to assist you while getting out of the bathtub, we quickly realized this was not made to hold much weight at all. So it must have been for towels? right?
Here it is broken. The bar was pulled on (over a year ago) and it snapped out breaking the two tile holders on either side.


It doesn't look too bad from the front.
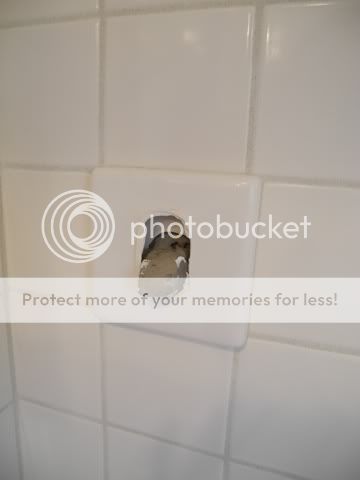


But from the side the gaping holes that were left behind had sharp awful mortar sticking out, just at the right height to scratch the cr@p out of an unsuspecting arm. OUCH!
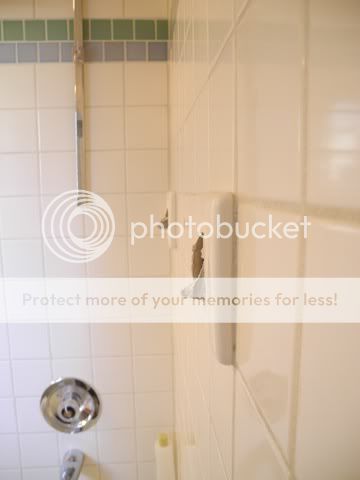

So in my head I was going to perfectly chip out the broken holder bases that were there, and find exact matching 4.25" square, off white tiles to replace them.
Well the nearest tile shop was a 30 min drive each way, and I didn't feel like spending more money on gas than the tile would be. So I chipped out the bases, and all that extra mortar and tiled in two of our extra Talavera tiles from our master bath renovation.
Tada! Cheap fix! Well actually free fix, since we already had all the supplies.


Okay so they don't match the white, but atleast they go with the existing blue and green border tiles above.


The best part is they don't have dangerous pointy scratchy edges that want to cut you! Yeah!!


So, it was a day of half a$$ed fixes, but I think they turned out just "good 'nuff"



Sunday, January 1, 2012

Twenty twelve

The New Year is here, today is the first day of 2012. Lets hope this warm breezy weather we are having is a sign that this year will hold many pleasant & unexpected events like today.


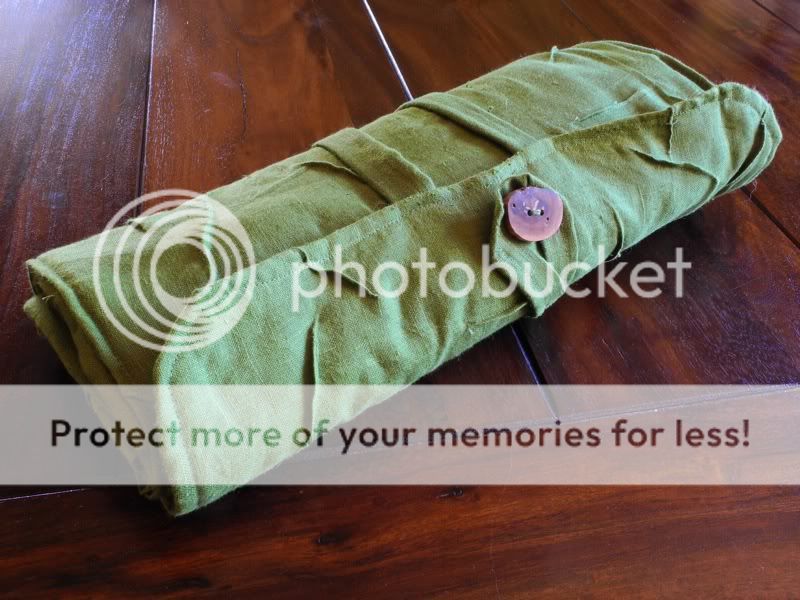
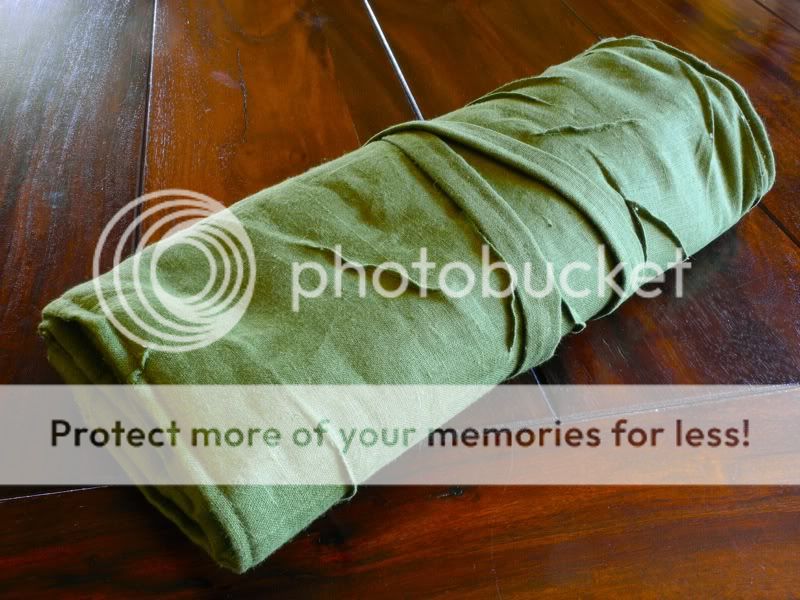
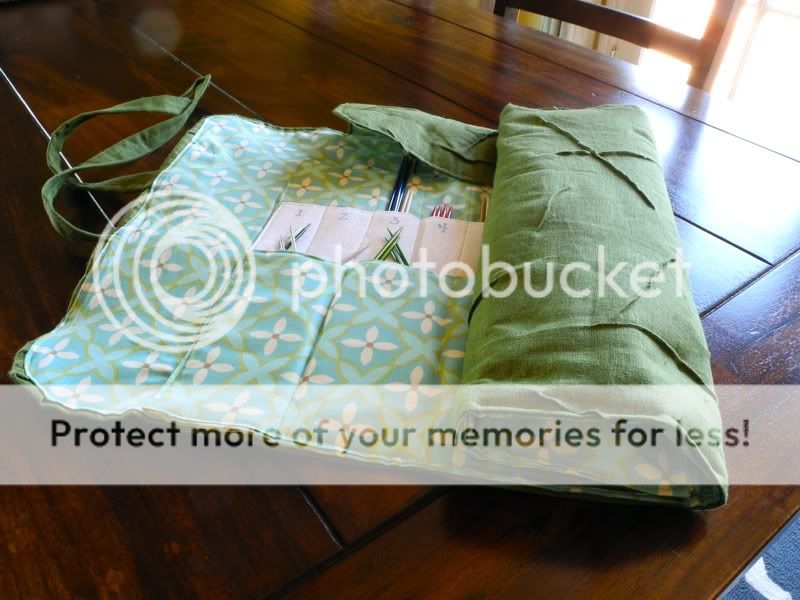
The first project I would like to share with you is my handmade knitting needle case. I technically made it last year (yesterday) but didn't have the daylight or the energy to take pictures of it till this morning.
It was a total labor of love, and also craziness. It took me FOREVER! Well like 8 hours, that's a really long time and my whole Saturday. But I totally love it and it's extremely practical, plus the cost was minimal....if you don't count the labor :)

I saw this pretty item on Etsy, and quickly pinned it on Pinterest, along with similar cases. I have been in need of a much larger and safer knitting needle case since I started knitting last spring. My old one worked pretty well, but occasionally I had needles slip out and with the price for knitting needles that is just plain unacceptable.

The price tag of $104 with shipping for the large case on Etsy was pretty crazy too (or so I thought). Also I wanted something a bit more custom! Or course. So I headed to the craft store and picked up $20 in fabric & supplies and a button for $6, going into the books as "the most expensive button I've ever bought".

I made my case out of some cedar green linen that I had left over from my pillow project a couple years ago. I used the crinkly texture idea from the etsy seller above, and sewed some organic looking creases in the linen first.


The outside of the case has a very natural feel. The randomly creased leafy green linen, and my favorite part of the whole case, the manzanita branch button handmade by a local artisan. The button is fabulous, super smooth feel to it, but really rustic at the same time.


The inside has a vibrant patterned cotton fabric that I picked up at our local quilting store. Its a fun, unexpected interior that I just fell in love with. The cottons at this store feel amazing, and the iron on fleece that I sandwiched between each layer of fabric holds on to my needles nice and snug.


I made my case extra large. It's interior dimensions, not counting the flaps is, 15" x 24". Total of 19" x 28". I added a velcro pocket to the right to hold my measuring tape and other larger items.
There are 30 pockets for all different needles and a circular needle hanger over to the right.


The case has safety flaps to hold the needles in safe and sound. I numbered the pockets on the white fabric row for organization. The whole case rolls up to about 6" x 15" when closed.


I may be seriously considering making a clutch out of this fabric. I love it! It's my new favorite thing in my knitting bag, and totally practical. Can't wait to show it off in the yarn shops to my fellow yarn snobs!


Sunday, December 11, 2011

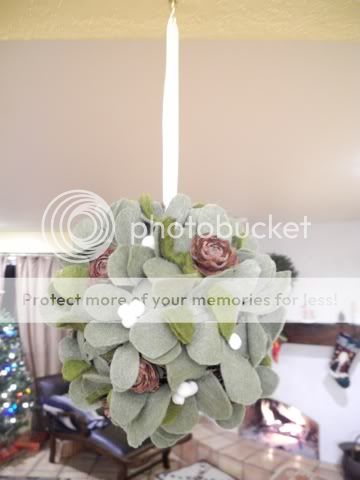
Mistletoe Kissing Ball

I was inspired to make my kissing ball after I saw this link on Pinterest. Although my faux mistletoe technique was totally different from the link I posted, I still made use of the felt material to make mine.

Materials used:
1 Grapevine Ball 6"
Cream ribbon
5 squares cheap felt (synthetic) in pale green
1 square wool felt in leaf green
bag of mini white pom poms
hot glue
wood roses (I collect mine down the street)


I didn't take any photos of "how to" steps....sorry. I was on a crafting buzz after getting back from Michaels, Walmart and the Yarn Store!
To make it, I basically cut out a bunch of mistletoe shaped leaves from the felt, hot glued them to a grapevine ball, and then added few white pom poms. I filled some of the empty spaces with my wood roses, because, well I have about 8 pounds of them & I think it breaks up the green nicely with some contrast.
I looped the ribbon through one of the vines and hung it from a hook, pretty easy right? Make one! You'll love it :)


I just happened to hang it in the walkway between our dining room and living room, so Mr. B can't miss it!


Happy kissing!

Other great tutorials on Mistletoe Kissing Balls here!
Martha Stewart Live Mistletoe Ball & Silk Kissing Ball


Related Posts with Thumbnails