Tuesday, November 29, 2011

Baxters new "do"

It's been a while since I have done a Baxter post. So here is our pup!


This is Baxter our Lakeland Terrier, he is now 6 years old and just got back from a new groomer that gave him such a great new do.
Just check out that profile!


He is pretty much always playing, but going around and around in the bushes is his favorite thing (besides eating). He is one lucky pup that gets to go to work with us and have plenty of room to run around all day.


Sunday, November 27, 2011

Pincushion sweets

Today I felt I had to make a pincushion in the shape of a cupcake.

So I did.


I really winged this one, so I don't have step by step tutorial in case you want to make one of your own, but I can try to explain what I did.

I cut a large circle out of cream color felt, about 9" in diameter. I then cut a frosting shape splatter out of pink felt and stitched it on with brown embroidery thread.
I basted around the outer edge of the white circle for the next step.


The basted stitch made it so I could pull it tight and gather the bottom for a nice little pillow.


I took some upholstery batting and tore it apart to make stuffing.


Here it is all stuffed. I think it looks like a Chinese dumpling. It actually gave me a major craving for Dim sum, yummy!


I had this one small white ramekin dish that didn't match any of my others so I pushed the stuffed pillow into that. You could hot glue it in to secure it, but I didn't.


I had the sleeve of an old cashmere sweater that the moths got to years ago, (darn moths, I hate them!) so I hot glued that sleeve cuff to the outside of the ramekin. I also glued a small circle to the bottom to make it look neat and finished (not pictured).


Final steps are the cute finishing touches. I felted a red "cherry" for the top and pinned it in with a leaf green sewing pin. I also glued on a cute grosgrain ribbon with polka dots.


Cute enough to eat!


Here it is with some of my pins stuck in it, kind of like sprinkles! I just love it.


Wednesday, November 23, 2011

Macaron success!


Yeah you heard me, after last nights (see below) Epic fail, I have succeeded!
Okay I can't really take the credit because I had a very awesome friend come over and pretty much show me how to make them and I watched. I did help out with piping them out though.
Basically I think I can rock these little cookies now. She showed me that there are 4 important things to baking French Macarons. They may seem like obvious points, but they are really important to these particular cookies.

1.) A good recipe base. (which I now have! )
2.) The right ingredients
3.) Sifting and Folding are key!
4.) Temperature changes before & during baking

And look! Our macarons have "feet", yay. That's the little spongy base at the bottom of the cookie. Besides looking great, they were also delicious. These are Allspice macarons with chocolate ganache filling. They are Thanksgiving in a cookie.

Tuesday, November 22, 2011

Epic fail.

I was hoping to post some great photos of my first macaron baking experience, but alas, I failed.
I did not bake delicious light crispy coated chewy centered French Macarons, but dense very almondy chewy almond paste cookies. (it could have been due to my cockiness as a baker, and I felt I could substitute almond flour with almond paste, big mistake)

Ahhhhh, failure, you are not something I experience often, but I don't hate you as much as I once did. I handled tonight's mishap with a little advice from the kitchen of my mother. When something doesn't look as pretty as it should, or taste as you want it to, dip it in chocolate!
So that's what I did, well I drizzled my chewy almond cookies in dark chocolate and they are really yummy & cute, just not, I repeat NOT French macarons.


Monday, November 21, 2011

Macaron mania!

I have been wanting to attempt French Macarons for sometime now. They are amazingly delicious, as well visually appealing. This cookie is versatile and ideal to change with the seasonal fruits and nuts available to us here "on the farm".
Look at all the pretty colors!


If you know me at all, you know that I don't just jump into anything without a ton of research. This includes building a piece of furniture, upholstering a chair, or cooking anyhing. Its what I like to call my OCD of perfection.

So the same goes with baking French Macarons. I have looked up multiple recipes, asked friends that have baked them, I've done some recent field taste tests, and even watched videos.
I know, I know, I'm nuts!

~Speaking of nuts, what has sparked the need to bake these cookies is our overload of home grown Pistachios. We have about 5 female trees that were loaded. After picking, peeling, drying and shelling quite a few of them, I crave a different outlet with pistachios then salting them and eating them as a snack.
I want a dessert! Or three!

So in my search for the most epic macaron recipe I found this this absolutely adorable video of a young woman (I think I read that she is from Brazil) being delightfully chipper & entertaining while baking macarons with tons of great tips.

Her blog is Dulce Delight
Although I don't plan on using her exact recipe, I am going to be making Pistachio flavored cookies so I can certainly use some of her techniques.


So stay tuned for my actual macarons, let's hope I succeed!


Sunday, November 20, 2011

Hanging around on a rainy day

I just picked up this really great space saver clothing line for indoor drying. On a rainy Sunday like today, I still need to hang up some articles of clothing that can't go in the dryer. Our small laundry hallway posed a bit of space a challenge for setting up a clothing line.
This 5 line Sunbeam brand retractable one works great.


When it's extended it obviously blocks the cabinets above the washer and dryer, but as soon as I'm done with it, I just lift up the other end (shown here) and it rolls back to the other side and it's out of the way.


I hung up this little copper basket to hold clothing pins and keep them easily at hand. I was pleasantly surprised when I got it home and Mr. B installed it, to see that it matched our cabinets blue almost exactly.
Yay, for unexpected coordination!


Friday, November 18, 2011

Stamping out ease

I love it when I find something that can combine visual appeal and make life simpler at the same time. That is a true "win win" for me.

For years I have wanted one of those old fashioned wax initial kits for stamping our seal on all of our letters. Let's face it, as cool as they look they are just not that practical for mailing real letters, and they are not fast and simple to use. There is all that melting involved.


So lately I have been lusting over personalized address stamps. I went online to check out the cost and found that some stores wanted $50.00 or more (once tax and shipping was added) to their overpriced yet adorable stamps.
So I searched a bit more, and found a site called rubberstamps.com that had them for under $20.00 and free shipping. So I ordered monogram #32 with brown ink and I got it in 4 days!


I used it with my Creative Memories tag punch tonight to make labels for our holiday gifts.


I am especially excited to use our new stamp for the holiday cards I have in the works this year. It will make return addressing so much faster and really cute.
So if you have been wanting one of your own return address stamps, I highly recommend the site above, and the quality of the ExcelMark stamps is really great.

The replacement ink cartridges are pretty pricey, so choose your color wisely!


Thursday, November 3, 2011

Squash art


What is it about pumpkin carving that makes you feel like a kid? The smell of a pumpkin just brings me back to being little and the first time I remember scooping out the "guts" with my hand. The whole process is so unique and totally fun!
This year was the first time we have carved pumpkins in years. We had two of our friends over for a carving party. We have used zombiepumpkins.com for their off the chart awesome templates in the past, and this year we went back for more.

Here are Stephanie and Bear having some fun with the radish eyeball apps. I had made them last year also for our pre-haunted house party. They are really simple to make, they look great/creepy and they taste so good!
Stephanie is wearing a really cool white feather wig in this picture. That was about the extent of the costumes this year. It was the first time in years that we haven't dressed up.


Here is Bear's Zombie creation, he used a drill to quickly drill holes all over the back of the pumpkin for a really great effect.


Stephanie, who is so creative came up with her design by combining elements of two templates she liked and her own ideas, she free hand drew this right onto the pumpkin. Pretty impressive, and really cute!


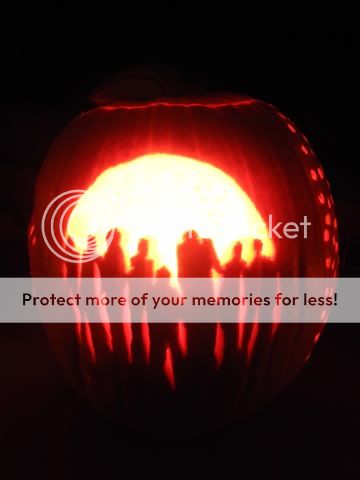
Mr.B used the template for the "headless horseman", I love the flaming pumpkin head.


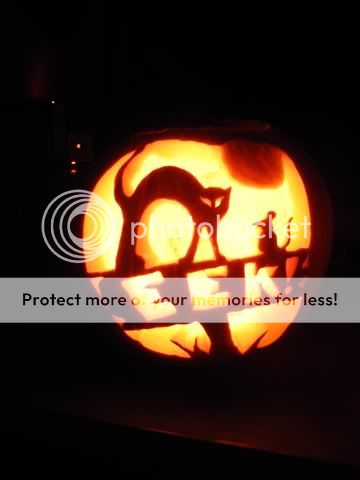
I have a thing for owls, they are such beautiful birds. This little cutie was irresistible, so I had to carve it.


We had apps and dinner followed by hot mulled cider and pumpkin pie. During the evening we watched scary flicks (more like listened to them in the background), as we carved.
Here we are posing by our creations in the dark.


The next night (Monday) was Halloween. Mr. B and I carved another pumpkin each.
I went with Edgar Allan Poe, I just love this one!


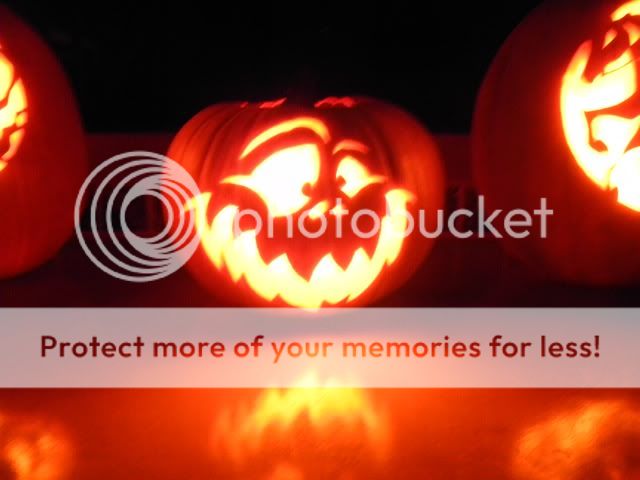
Mr. B went with a goofy Jack-o-Lantern face for fun.


Hope you all had a fun and treat filled Halloween this year!


Related Posts with Thumbnails