Showing posts with label Furniture. Show all posts

Friday, March 20, 2015

We took a wall out!

I finally talked Mr. B into taking our entryway wall out!!
We always wanted to, but after 5 years of other renovations it was forgotten about. Recently I have been reminded how much I disliked the close quarters that our entryway wall caused, it was especially bad when company came over. They would walk into this small, low ceiling room where I was standing, and immediately we would all need to go left or right. It was always pretty awkward. 

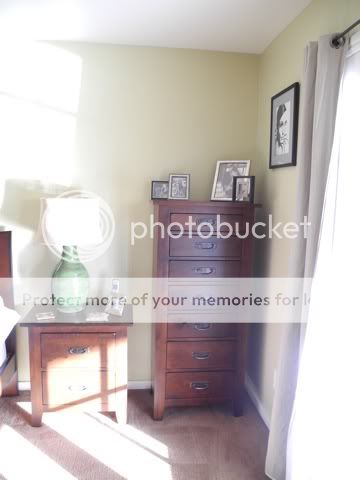
I did like the decor in there, the lighting and wall were a perfect space for my painting, and the entryway table held my absolutely favorite birthday present ever, the cobalt and white chevron striped Ginger jar, hand made from Mexico, Mr. B got it for me years ago. It was quite a way to showcase those pieces.
But....the ceiling was literally almost 9" lower than the rest of the house in there, and you had to walk through a narrow area to walk into our house to the right, or step left into our sunken living room.
The space was just not very comfortable to be in.


Entryway with wall


Here is the view of the back of the wall, from the family room. We never really used that couch, it didn't lend itself to a nice place to sit. Bye bye wall!

Here is a view of the wall from our bedroom hallway (this was mid kitchen cabinet remodel)

Our framer was telling me that we may have to keep this small 18" part of the wall depending on the load bearing issues we would face once they tore into the drywall. I was really hoping that wouldn't be the case, having a weird vertical little wall would have been so hard to decorate around, let alone walk around.
Demo day! The guys found a large load bearing beam running along the ceiling, and it had to stay, but the whole wall was able to be removed. Yay!

We also had our guys rip the drywall off the ceiling in the entry way and raise it up 9" to match the ceiling in the family room. It was then covered in the same tongue and groove wood and beams to match as well.  

What a mess!!! But it was looking better already :) So open!


The ceiling being elevated was a huge help, you can see it here just slightly, but in person the feel is really quite a difference.
You can see here where the ceiling started in the entryway (the yellow drywall stopped where the ceiling was). Bringing it up to match was a great help. But like I said, that giant beam running through the room had to stay, I would have preferred it gone, but we plan to paint it all white to blend in.


The craziest thing about this wall removal, is that we discovered the wall was at some point an addition! Must have been added sometime in the late 1980's. I thought for sure it was part of the original 1970's cavernous design, but in this photo you can see the original tongue and groove is painted brown, showing that the room was once all opened up, just as we would have liked it (well aside from the color scheme, who paints a ceiling dark brown?).


Here is a view from the kitchen to our front doors. It's so much brighter in our family room, I just love it! Now we just need, drywall, tile, and then paint.


The drywall guy did a fast and a great job matching our texture. Our Saltillo tile floor was in need of some patching. Our tile guys popped out the partial tiles and matched (as well as possible) the older tiles.


You can see the newly laid tile here, before sealer. They should darken up to match the older ones, with a few coats of glossy seal. Mr. B got right on paint, here is a shot of the first coat on the ceiling and beam, the walls are done. 


Mr. B also cut in the holes for our can lights to go back in for the entryway. Looking better with paint!


• • • 

All done!!!
Here is our new entryway/family room! One step closer to an open concept home. I think it's made a HUGE improvement. It has brightened the whole living space up. The flow of the house just feels better, and certainly makes more sense. We are actually using the room, where before we just used it as a walkway to the kitchen. Its so much more inviting and comfortable, it's one of my new favorite rooms to hangout in now.


Every time I walk in the front door, I'm pleasantly shocked at how open it is.


 Just a little fun before and after, I think its like having a new house!


Till the next project!


Saturday, January 5, 2013

Let the Nesting Begin!

I have begun to have that "nesting" feeling happen, and I am loving it! After over 3 months of literally zero energy, I am very happy to say that I have been able to start our nursery decorating and moved our guest bed into my craft room. I am now into my 21st week of pregnancy.

Here is a previously taken photo of the guest bedroom (now our future little one's room).
We have a 3 bedroom home, that is shrinking by the minute. My craft room is something I cherish, and use on a daily basis. I am coming to grips with the fact that I may not use it as much once little B makes her way into our lives. But for the next 4 1/2 months, I plan to use it every minute I have to myself. So the queen guest bed has moved in on my space in there, (thank goodness they are large rooms) but I am making good use of it. In fact I am blogging while sitting on the bed right now. Its kind of nice to have a soft place to lounge while researching craft ideas, inspiration, or while blogging!

I have also begun a complete clean out and organization of my craft room, so I will have a useful space and know where everything is.

Now for the Baby's room! 

Originally I was going to paint the room a turquoise/sea glass green, but the more I thought about the neutrality of the current paint color and how much I love it, I decided to keep it this pale green and go with a nature inspired nursery. It's "Outback" by Behr. 

We bought a crib! It was a Costco special, and I just couldn't pass it up. You know how Costco is, sometimes they get things in for only a week, and with only 4 in stock, it being a 4 in 1 crib to bed convertible with all accessories included, and a solid hardwood construction, it was a no-brainer.  Sure the crib is a dark espresso stain, and doesn't match the golden oak armoir or dresser, but who cares?! It works, and it's just mis-matched wood colors, not the end of the world.
We also picked up the comfy chair in the corner, just yesterday. It matches my already existing ottoman, and is also a removable slipcover style, so it's easy clean up if anything should get on it. I love washable furniture. 
 
As you can see I have blank canvases all over the room, 3 to be exact. I bought these years ago at an art supply's 50% off canvas sale. I've never gotten around to painting masterpieces on them and I thought I could easily paint nursery art for some cheap decor! The one above her bed, I plan to paint her name on it in a branch style font.


This one is most likely going to be a whimsical tree. 
So I have been pinning (on pinterest) inspiration for Nature Themed nursery art. Mostly Owls, which I love, and trees. In colors that lean a little more in the girly direction, because after all we are having a little girl :) 

   
Here is a sketch of the painting to go to just the right of the window. It's little owls sitting in a tree, in a night scene. I hope to start on this painting today. I'll post a photo when it's done. 

Here is my latest purchase, and hopefully one of the last for decor in here. I picked up these sheer window panels from Cost Plus World Market yesterday when we bought the chair. I was planning on sewing curtains in a plain white solid fabric, but when I saw these I just knew they would be perfect. They are light and airy, with a botanical theme, and a little felt birdie ever so often that matches the green wall color so well
I just hung them up last night after Mr. installed the curtain rod, and I haven't gotten around to steaming the fold lines out yet, don't judge me! 


It's coming along well! I just love going in there and dreaming of things to come. I'll try to post any updates as well, I know I've been a bad blogger. Hopefully a new year will change that.


Saturday, January 21, 2012

Finally bedroom furniture!

The reason for the above mentioned "finally" is that I had ordered new bedroom furniture back on....Labor Day, from an online store that (long story short) went out of business. So I had to re-order the furniture from a real store after Christmas, and we got it in a month. Yay for real stores!

We did have perfectly usable solid wood furniture that was given to Mr. B many, many years ago. Shown below the oak nightstands that clearly did not match the darker wood bed that we bought 2 1/2 years ago when we moved into our new home.
Before


It's been doing the job, but driving me a little bonkers, also it wasn't enough drawer space for all of our clothing.
Our closets are super tiny and we have a lot of knitted goods (as you can imagine) and small things (unmentionables) that were being crammed into 3 drawers between the two of us.


This is our Kindcaid USA made, solid wood bedroom set :)
It's a beautiful distressed dark wood finish, that just happens to match our Costco bed just perfectly. The style is called Stonewater.
After


Oh what's that in the corner you say? Oh that's my new Lingerie Chest, it rocks.
I didn't think I could love a piece of functional furniture this much, but it has turned my crammed, socks, hats, scarves, underthings, & even jewelery into a perfectly organized and well kept goodies. I smile every time I open it.


It fits well in the corner of the room by my side of the bed. I was worried it would look crammed in, but it really goes nicely in that corner. Now I think it would empty without it.


This is our new dresser, or what the furniture company calls a "Drawer Chest". Its mostly for Mr. B (I got one drawer) and our TV. The size difference from our old armoire is major. This dresser although it holds more clothing it's substantially smaller, therefore makes our room feel larger.


I will feel a bit more at ease walking my way into the bathroom in the middle of the night now. I won't have to worry about my toes as much with this little lady.


We moved the old oak nightstands and armoire into our guest room where the long dresser that goes with the set has been all along. Now its a nicely matching and functional set for our guests.


Here is the new stuff one more time all together, just for me. I can't believe we actually got it after 4 months of waiting. It was totally worth it.


Saturday, September 10, 2011

What happened to projects?

I've been totally MIA with blogging lately, not because I forgot about it. I just haven't been working on any cool projects. I have totally stopped decorating and have been busy working, maintaining our yard and knitting. I smell a change in the air though.

Fall is certainly in the air this morning. We awoke to a thunder and lightning storm and even a bit of rain. After the 105 degree temperature we had this week, it's really refreshing. I have been harvesting my decorative gourds, and watching our pumpkin patch grow.
Yesterday I picked up a few goodies that will hopefully be the new stars in my Fall decorating.
This wooden bench for our front door entry.


I plan to decorate it seasonally, and have already set out a basket of gourds.


Then I checked out a new craft store in town! (can you sense my giddiness?) I found these awesome papier mâché skulls for $3. They are the perfect blank canvases for me to dec out in Dia de Los Muertos fashion. I am calling them Mr. & Mrs. Muertos for now.
I cannot wait for the hand painted fun that awaits me! Craft on!


Sunday, August 15, 2010

Zig zag footstool

Remember this little guy?


I scored this cute old little footstool base at an estate sale months ago. I have been wanting to restore it for a while but I couldn't find the right material. I wanted something that would match the ginger jar that Rory got me for my birthday.


While I couldn't find any thing to match, I decided to paint the pattern with fabric paint. Here is the finished stool, it only cost me $5.00 for the wooden stool base, and the cost of the fabric paint, everything else I had from previous projects.


I used the white linen I had leftover from the two cane chairs I finished last month. I practiced on a scrap trying to find the right shade of blue. I printed out a template that I quickly made in photoshop.


The material is slightly see through so I placed the template under it and traced out the zigzag pattern with an embroidery marker that comes off with water. You can barely see the light blue pen mark in the photo but it was very apparent in real life.


I used a nice square firm brush to fill in the lines with the perfect shade of blue. Once the paint dries you just iron the back side of the fabric to set the paint in, then it is waterproof and washable. It is actually great stuff, and was my first time working with it. I used Jacquard Textile Paint, in a mixture of Navy, Sapphire Blue, and Violet.


With the supervision of Rory, I used a skilsaw and cut out a plywood base for the cushion. I pieced together two pieces of 2" upholstery foam that I had from the chair project. Just a bit of spray contact cement to bond them together in the center and to the board.
~That is why I can't throw anything away, you never know when you are going to need it.


A piece of badding goes over the foam and I upholstered the whole thing with a piece of white liner material because the linen is slightly see through.


After I stapled the white liner material on the cushion I laid the zigzag material over the cushion, then pinned the corners so that I could sew a neat corner seam for a fitted look.


Here it is almost done, I trimmed the excess material then stapled to the bottom a piece of black dust cover.


Last minute we decided it would look great with a trim of single welting. I was not hesitant to add that to the project as I was eager to try out my new single welting foot that I bought after my last upholstery project. Let me tell you this foot was worth the $5.00, it made making custom welting a piece of cake!


I hot glued it down to the wooden base, then trimmed around the screw holes.


Then screwed the cushion to the base.


Voila!
Related Posts with Thumbnails