Monday, December 28, 2009

Master Bathroom Renovation, coming soon!

Starting soon we will be dusty & dirty while we are demolishing our master bath to make way for the new!
I am very excited and nervous at the same time. We just ordered hardwood floors to be installed in the "art room" next week and also for the new bathroom.
But first we need to get the whirlpool tub working, demo the closet in the bathroom, remove the sinks, counters, and existing vanity. Rip out the floor, then temporarily take out the toilet to move the drain and the water source. Plumb in hot and cold water and a drain for the "new" whirlpool tub, and put in electrical for the pump. Then Rory needs to build a tub deck, and a new vanity. We need to order a lot of tile and install it all.....yikes! And then we should be proud DIY-ers of a new master bathroom.
This may take us a while to do, but I think in the long run we will be happy we are starting it now, and not during jetski season!
Wish us luck, and here are some inspiration pictures of what we would like.


Two hand painted Talavera sinks, we haven't picked out a pattern yet but here is the look.


Friday, December 25, 2009

Christmas morning and no power


We woke this morning to a beautiful Christmas day. We were enjoying the fire and our coffee as the cinnamon buns were rising. We opened our presents while the oven preheated, and then the power went out! We waited... and waited... and walked the dog.... then waited a bit more....
Around noon the power came back on, and we were smelling our cinnamon rolls baking shortly after.


Rory was very excited for them and we were both so hungry by then.


My cool Cowboy boot remover, Rory thought I would love the shape of it. He told me a funny story about the women in the store telling him what they thought it was. One said, "it's a cricket!" Another said, "I think it's a cockroach" We were laughing at that although it's similar, we both thought it was quite obvious what it was in the shape of. Do you know? It one of my favorite ancient symbols, and is also one of the logos of Rory's favorite car paint company.


Baxter had a great Christmas day, with a new toy and two walks. Plus a bonus dinner of left over mashed potatoes and prime rib drippings and kibble!

Thursday, December 24, 2009

Christmas Eve Dinner, in "a real house!"


We just had our first successful Christmas Eve dinner in our new home.
Last year the tradition started with Rory and I hosting Christmas Eve dinner, and my immediate family joined us. That was our first Christmas time meal in our own town! But with such a small rental home then, it was quite cramped, even with just the 5 of us.
This year in our new home, with a real dining table and beautiful Denby dishes, we could all sit at together and enjoy a wonderful grown up meal. We are both so thankful for all we have been blessed with this year, and thankful to those who made it possible.
Well I got a little excited about the big dinner and ordered a 5 rib bone-Prime Rib. It was an 11lb monster about 16" in length. I was worried it would be WAY too much meat, but we all had plenty at dinner (except my dad, who I made a vegetarian stuffed portobello) My bro took a nice chunk home with 2 ribs, Rory and I will have Christmas dinner tomorrow with the remaining and even Baxter took a nice meaty bone outside and enjoyed his dinner! Lucky boy.


We also had fresh steamed asparagus, sauteed carrots, mashed Yukon gold potatoes, with gravy, and a delicious salad brought by my mom.


For dessert I made an English Raspberry Trifle. It was a layered delight of lady fingers soaked in Meyers rum and raspberry jam, vanilla custard and fresh berries, and I whipped triple sec into the whipped cream, and it was to-die-for!
I was so excited about all the food I spent all day cooking I forgot to take pictures of most of it :(
But it was all beautiful, especially the dessert.
We are so full from dinner, and tomorrow there's more with the Christmas morning cinnamon rolls. After all this wonderful food for the holiday's I am looking forward to the New Year and a bit less consumption!
Merry Christmas to all and to all a good Night!

Wednesday, December 16, 2009

Forgive my ugly Rugelach!

I made Rugelach for the first time today. Similar to Baklava in difficulty, it must take generation after generation to have the hand at making these tricky little guys. They may not be perfect or at all attractive. But they are so delicious, I can't wait to share them with family.


Sunday, December 13, 2009

A day of chocolatiering

I spent most of this damp day in the kitchen making candies. Candied Orange slices and Marzipan orange ganache truffles. One of my favorites.
They were not easy on me today though, the chocolate tempering went less then desired, and the oranges cooked faster then expected on our new stove top. Maybe it was the weather!
They may not be perfect, but they still taste good and that's what counts.


Plus here's a cute picture of Baxter. He jumped up like he was going to have a cup of Joe and relax.

Saturday, December 12, 2009

I won!

I entered a contest to win one of many prizes given away on one of my favorite blogs. The blog posts wonderful DIY makeovers including furniture, fixtures, decor, and much more.
"The DIY Show Off"
The DIY Show Off

I won an 8x10 print of my choice from Etsy seller Hirondelle Rustique

Her Prints are on Archival paper and look lovely in a matte and frame, which I plan to do with ours. Here were my other choices, but I could only pick one. I love the tree, but we have nothing with those colors. And the fox is so whimsical and just our style.


I chose this subtle neutral beige and white botanical print to go along with our botanical theme in the Master Bedroom. I can't wait to get it! And I still can believe I won something, that never happens.

Thursday, December 10, 2009

Wood choices

Well the extra bedroom, which I am calling my "Art Room" needs a floor. The existing Linoleum is definitely not staying. I need a flat hard surface to cut material for sewing projects, so tile is out, it can't be carpet either in case paint or charcoal gets on the floor. The floor we choose is also gong to be put in our master bathroom as we currently have white tile and old carpet in there now.
So we have decided to put in a dark stained, distressed hardwood floor to go with the distressed Saltillo tile and the new brown carpet. Here are two options we are considering.

Option #1.
This is the lighter of the two, a staggered size plank in 4" 5" and 6" plank widths.


Option #2.
Here is the darker of the two, in a thinner 3" plank all uniform in size.
(It looks like two different colors but this is the same sample, just my picture taking skills at work here)

Sunday, December 6, 2009

The Mezzanine is up!

Rory finally had the time to buy the materials and build his garage mezzanine this weekend. He finished it today and is very happy about it being done. He has tried to do this project for about a month and hasn't had the time. It looks great and we will start moving all of his extra engine parts and jet ski gas tanks up there so I park my car inside! Yeah!


I had a weekend full of shopping and I am happy to say I am mostly done. I spent the evening cooking and making these pine cone ornaments for our tree.


Saturday, December 5, 2009

Cookies and Shopping

We had so much fun making Halloween cookies over a month ago, that we decided to do Christmas themed ones last night. These are simple butter cookies decorated with a royal icing in a flooding technique and we used little nonpareils for decoration.


After Baxter's walk this morning I will be heading into town for some Christmas shopping, and errands. Wish me luck!

Thursday, December 3, 2009

Oh Chrismas tree...

...Oh Christmas tree, Why did Baxter get stung by a bee?
Here is our tree all lit up and decorated.
Now that we can have a nice large tree in our new house I think we might need a few more ornaments to cover it.
We did get a new topper, a rustic star with pine needles.


Poor Baxter was stung by a rouge indoor bee. We were eating our dinner when Baxter ran in looking especially scared and like something was hurting him. I could figure out what it was, until Rory was dive bombed by a bee that was descending to her death, since she stung our little "B" right on the face! We washed him and after blow drying him I noticed the sting spot. Ouch!

Monday, November 30, 2009

Snowman makeover

I changed the clothes on this snowman Christmas countdown, with a bit of paint. I think he looks more in fashion now.

Before


After

Sunday, November 29, 2009

Garland and Bows


We hung our stockings over the fireplace! This is the first time I have had a fireplace for Christmas so I couldn't wait.


We spent the day putting up Holiday decor, Christmas lights, garland, bells and wreaths. It's our first Christmas in our new home, so Rory decided to hang up outdoor lights.


Our entry table is now in the holiday spirit with just a bit of greenery. I filled a large glass vase with acorns and pine cones from the front yard and these great pine branch decorations.
After the move we noticed Rory had a few old boxes of glass balls and lights and a few other holiday decorative items from long ago. I found these two porcelain candlesticks in the boxes. They were a little dated, painted red, green & gold with hot glued plastic gold holly attached to them. So I popped off the holly and gave them a fast brush of white paint.

Friday, November 27, 2009

Pottery Barn Decorative Pilllows, how to.

I visited our new Pottery Barn store a couple weeks ago, and loved what I saw. But I didn't love the price. These beautiful and simple linen deco pillows stuffed with a feather insert, they are cute, comfy and can be used on couches, chairs or beds.


We recently scored a great solid white slip covered couch that is in dire need of some decorative pillows and color. Seeing these, I thought that's simple enough and at $25 a cover +$12 a down pillow insert, I can make them for way less.

I bought the feather inserts at Crate and Barrel for a better price and even took advantage of the free shipping that day. I've decided to make 8 pillows total and bought 5, 18"X18" square pillows and 3, 12"X12".
I found a great online store for the fabric, I bought 100% Linen from Russia, I found it here at www.fabric-store.com, it comes by the yard and is 59" wide. I used around 1/2 a yard per large pillow case. About 2-1/2 yards for all 5 was enough.
I am beginning to buy my fabric online as the prices are so much better then local stores. As long as you wait for the free sample swatches to come in before ordering yards, it's perfectly safe. I loved the "Cedar Green" more then the color of the PB pillow.
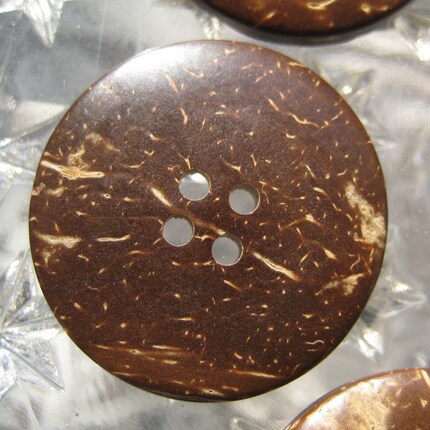
I found 8, 1-1 /4" diameter coconut buttons from Etsy for $5.


I made a quick pattern out of paper, it helps me when doing multiple cuttings. I folded the fabric and pinned the pattern cutting 2 at a time for each piece.


For the each 18" square insert I cut 3 pieces of fabric. One 19"x19" square per pillow case.
One 19"x16" for the bottom of the envelope opening and one 19"x9 1/2" for the top
(total 5 of each size to do 5 pillows).


I sewed a 1/4" wide cord with a scrap piece of material to make one long cord. I then cut it into 6" pieces for 8 total toggle loops, one for each pillow.


I pinned, and sewed the edges of the envelope opening first. The under flap with a 3/4" seam, and the over flap that you will see with a 1- 1/2" seam, I think bigger seams look nice and more professional.


Then I pinned the three pieces right side out, just like the case will be when done. I then sewed a 1/4" seam all around the edge, trimming any uneven edges.


This is the first stitch in a French seam, right side out.


Then turned the pillow case inside out and pressed the seam and sewed again 1/4" all around. This is a "French Seam" to conceal the unfinished edge completely. Go Here for more detailed how to steps for seams, including the French Seam. Not difficult, but you must make sure you sew over the rough edge on the final pass.

Turned it back right side out, and sewed the button on, then the toggle loop. put the insert in and Done!


I did this for all 5 large cases, and I'll do the same for the little cases, but shrink everything down. The cut pattern sizes will be 13"x13", 13"x 11", & 13"x9". The seams and toggle loop are the same as before.
Related Posts with Thumbnails