Showing posts with label Cake. Show all posts

Friday, March 6, 2015

Kitchen Cabinet Reface!

I never blog anymore.. I'm a bad, boring Mrs. B
But in reality I have been doing blog worthy things, just never taking the time to record them on the interwebs anymore.
So here is my attempt at getting our recent remodel permanently out to the world wide web.

Mainly I wanted to post about our very recently completed (today actually was the last day in this month long journey) kitchen cabinet refacing we had done, because when searching for inspiration I couldn't find many blog posts about it. I was nervous to invest time, money, and emotion in a refacing not knowing if it would be enough of a change, and concerned that a complete gut and all new cabinets may have been a better choice, eeek!

Well in the end I am really glad we went with a refacing, it was a huge improvement and a big money saver too! We got to keep our concrete counters that Mr. B built in 2009 before we moved in. 
The cabinets we had in our kitchen I imagine were installed around the late 80's to early 90's, so they were somewhere in the 20-25 year old range, and for particle board, painted cabinets, they had some major wear starting to show. I had thought about just repainting them, but I hated to put that kind of money into a style door I didn't like, and with the doors and hinges that didn't well I decided to go for it.

Here are our before and after photos of the kitchen cabinets. (we also did our laundry and hall cabinets doors to match)

First major change we removed the hanging cabinet above the large peninsula, to give the flow from kitchen to dining room a more open feel.
I love the removal of the hanging cabinets, yes I lost some storage, but those polls holding it up drove me crazy! Good grief, who designed that?


We also had about 4 sections of cabinet doors converted into large drawers, you'll see lots of drawers in this kitchen now, but its a look I wanted and a functionality Mr. B really pushed for. 
Oh we also deleted the two pull out cutting boards, because eew. Those things gross me out, and they killed the clean lines of the cabinets, so bye bye!


The original cabinet boxes all stayed, we removed all the old arched topped doors and drawers, hinges and slides. The remaining boxes patched sanded and were spray primed and painted in Dunn Edwards Swan White in a low sheen finish. 
Worst part about that was the spray primer smell, although our painters did a great job plasticine off the kitchen like a spray booth the smell was super overwhelming for a couple days. We had to camp out at my moms, (thank you mom) and when we came back the smell lingered for a couple weeks!


The style door we picked is a standard "shaker" door. We upgraded all the interior drawer boxes to pre-finished maple, all the interior shelves were remade, and all the hinges and drawer slides are soft closure Blum hardware all hidden. That upgrade really made a huge difference with it feeling like a total new cabinet remodel, for just a bit more cost. I highly recommend that if you are thinking of refacing your cabinets instead of getting all new.


The cup pulls and knobs are by Top Knobs, and I L-O-V-E them!
m1211 cup pull 
m25 knob


I christened our beautiful new kitchen with a marvelous new baked good that I plan to keep in my permanent recipe book.

My mom has a very giving kumquat tree on the property, that always graces us with a bounty of these amazing fruits. I looked up some inspiration online for something to do with them, other than marmalade. I saw a post on kumquat upside down cake! I used my go to recipe from my red and white Better Homes and Garden book, and I subbed out the pineapple for kumquats, increased the brown sugar in the topping a bit to help with the sourness of the fruit. I added a little clove and cardamom to the cake to add a little spice to go with that burst of citrus, so the cake wouldn't get lost, and it was almost too good.


From now on I'll know exactly what to do with all those kumquats, and I will have a beautiful kitchen to cook them in for years to come!

Sunday, May 25, 2014

It's been a year!

It has already been a full year since I had my daughter, and I can't believe the amazing things I have learned and witnessed being a mom. It is truly the most amazing thing I have done, so far.
As you may have noticed my blog has not been updated for just as long as I've been a mom. My life hasn't left much room for blogging, and I'm fine with that. I don't really have the same free time that I once had.

This is the set for Sasha's "Cake Smash" photos that I put together for the day of her birthday.

For her 1 year birthday I found so many wonderful inspirational images to theme the party for "under the sea" Go ahead search the theme for birthday parties, and you will see gorgeous parties with every detail adorably mermaidy and sparkely goodness that any girl would give her long flowy red hair to go to! So I thought I would post some of my creations based off the inspiration for others to see.
Sometimes its nice to see them in non staged, non photoshoped or without fancy editing to the images.


Here is the cover of the invites that I made, they were so much fun, but time consuming!


This was the way the party looked before everyone got here.
The sign on our front door.


The front entrance, I reused the circle banner I made for Sasha's cake smash photos.


The backyard party area, we have a pool so it was the perfect entertainment with little effort


This net holding the balloons was an adorable idea (thank you pinterest)


Beverage Station


I made pork carnitas tacos and all the fix'ns
  

Gold Fish crackers in this plastic fish bowl with scoop were a great snack!


These were the party favors for all the kiddos to take home, new beach buckets!

Mr. B and I both L-O-V-E shortbread iced cookies, so I had to make some, in starfish and shells


The cupcakes were topped with chocolate seashells


I hope to find time to blog about other wonderful things, we shall see...


Thursday, May 3, 2012

Dulce de Leche

I first tried Dulce de Leche years ago after my parents brought back jars of it from their trip to South America.
This delicious and hard to find sweet, it a real treat. It has a caramel like taste with a creamy texture. It's made by cooking down milk and sugar, very very slowly until this spreadable texture and caramel brown color are achieved. You can find it in some specialty stores here in the US and all over South America.
Unfortunately we don't have any stores in my area that sell it. The way people have made this dessert at home for years is by cooking an unopened can of Sweetened Condensed milk in a crock pot (slow cooker) for 8 hours. It works well, but I have a few problems with that process.
1.) I don't like the idea of cooking anything in a can. BPA can leach into the food that is in it, especially when heated to a high temperature! Yuck!
2.) I don't own a crock pot, or slow cooker.

So I came up with a very fast and safe solution to making my own Dulce de Leche at home.
In a glass jar, and in my pressure cooker.


Pour the contents of one can of sweetened condensed milk (I used Organic) into a pint Ball jar and tightly secure the lid.


Put the jar in your pressure cooker and fill half way up with water.


I closed up the pressure cooker and turned it up to high for 18 mins. After it was done cooking, I turned off the pressure cooker and let it release all the pressure slowly on its own. I opened the lid removed the very hot jar carefully and placed it on the counter to cool.
It's a much prettier color now!


This is the really cool part. The Dulce de leche continues to cook on the counter, actually it starts to boil after about the first minute out of the cooker and continues to boil for about 15 mins.
I took some video of it so you can watch in amazement as I did!


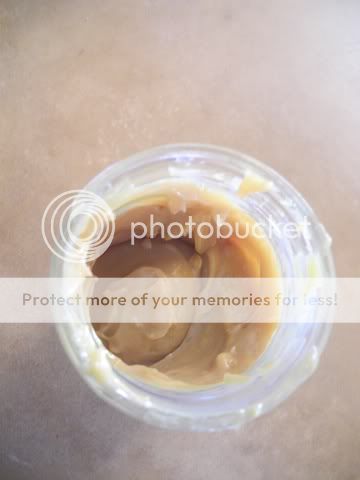
Here it is all cooled and done. Yum, yum.
Now you could certainly cook it longer to the desired color, getting darker and thicker the more you cook it, dulce de leche is good at all stages really.
I prefer it a little lighter, and more spreadable.
I just love how fast this is, its like instant gratification!

Saturday, January 28, 2012

Midnight Marzipan

Late last night along with good friends I whipped up some delicious Martha Stewart muffins.
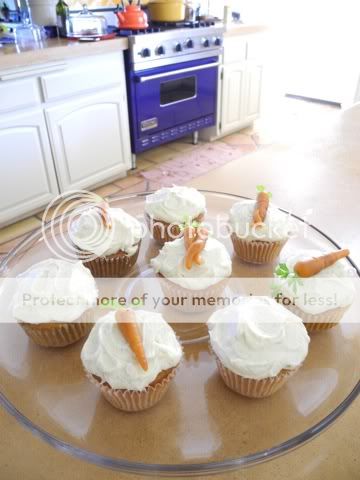
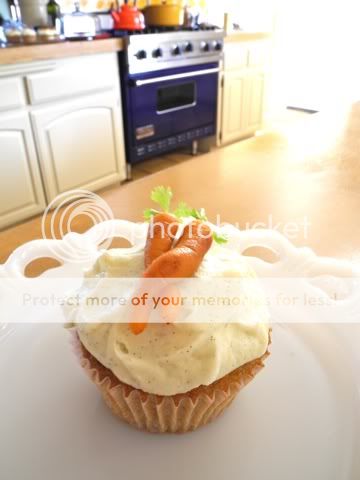
They are Carrot Ginger Spice, with Vanilla Bean Cream Cheese frosting. Topped with the cutest almond paste (like marzipan) carrots that my friend Stephanie (mostly) and I sculpted.


They didn't make it to the frosting stage till this afternoon. Not that they needed frosting, but Mr. B requested it, and I have a hard time saying no to him, and frosting.


The carrots are just almond paste tinted with a touch of gel food coloring, then shaped into "organic" carrots, dusted with cocoa powder for the earthy look and topped with parsley and mint sprigs.


Most of Stephanie's carrots were so darling and had such character. This is probably the sweetest and my favorite, "lovers embrace".


Recipe from Martha Stewart Baking book, but also found here.

I substituted the buttermilk for whole milk with a tsp of vinegar, because I didn't have any buttermilk. I also added about 3 cubes of candied ginger chopped finely to the batter.
The frosting I made was a simple cream cheese frosting with vanilla bean added to it. I think orange would be lovely though!


Enjoy!


Sunday, November 27, 2011

Pincushion sweets

Today I felt I had to make a pincushion in the shape of a cupcake.

So I did.


I really winged this one, so I don't have step by step tutorial in case you want to make one of your own, but I can try to explain what I did.

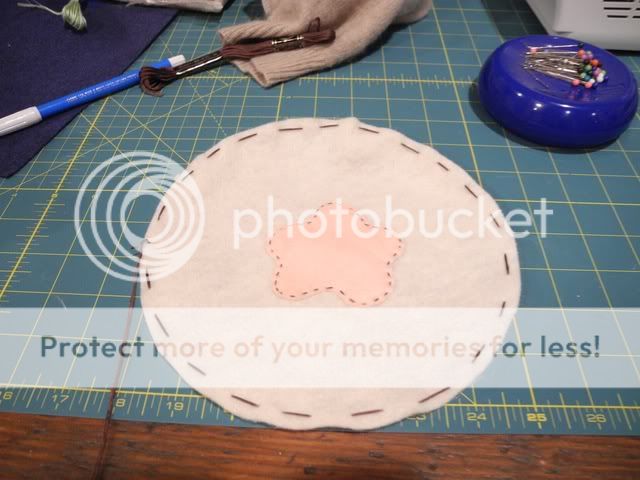
I cut a large circle out of cream color felt, about 9" in diameter. I then cut a frosting shape splatter out of pink felt and stitched it on with brown embroidery thread.
I basted around the outer edge of the white circle for the next step.


The basted stitch made it so I could pull it tight and gather the bottom for a nice little pillow.


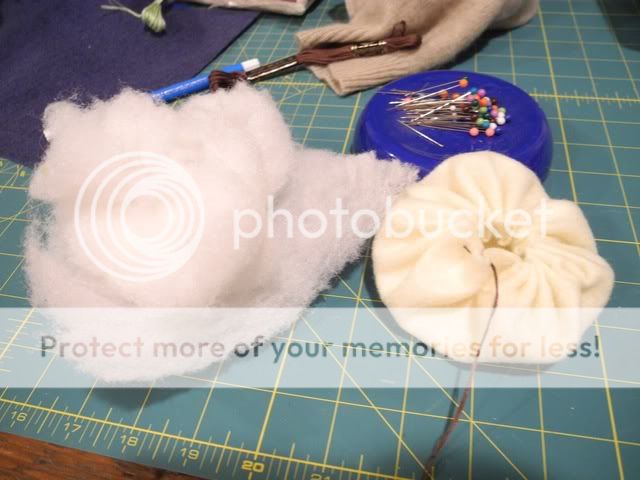
I took some upholstery batting and tore it apart to make stuffing.


Here it is all stuffed. I think it looks like a Chinese dumpling. It actually gave me a major craving for Dim sum, yummy!


I had this one small white ramekin dish that didn't match any of my others so I pushed the stuffed pillow into that. You could hot glue it in to secure it, but I didn't.


I had the sleeve of an old cashmere sweater that the moths got to years ago, (darn moths, I hate them!) so I hot glued that sleeve cuff to the outside of the ramekin. I also glued a small circle to the bottom to make it look neat and finished (not pictured).


Final steps are the cute finishing touches. I felted a red "cherry" for the top and pinned it in with a leaf green sewing pin. I also glued on a cute grosgrain ribbon with polka dots.


Cute enough to eat!


Here it is with some of my pins stuck in it, kind of like sprinkles! I just love it.


Wednesday, November 23, 2011

Macaron success!


Yeah you heard me, after last nights (see below) Epic fail, I have succeeded!
Okay I can't really take the credit because I had a very awesome friend come over and pretty much show me how to make them and I watched. I did help out with piping them out though.
Basically I think I can rock these little cookies now. She showed me that there are 4 important things to baking French Macarons. They may seem like obvious points, but they are really important to these particular cookies.

1.) A good recipe base. (which I now have! )
2.) The right ingredients
3.) Sifting and Folding are key!
4.) Temperature changes before & during baking

And look! Our macarons have "feet", yay. That's the little spongy base at the bottom of the cookie. Besides looking great, they were also delicious. These are Allspice macarons with chocolate ganache filling. They are Thanksgiving in a cookie.

Related Posts with Thumbnails