To end 2010 which has been a wonderful year I want to share this photo with you. I took it on Christmas night. The sunset was just so beautiful, my photo only shows part of its beauty. Have a Spectacular 2011.
A whole lot of painting and fixing up to end the year. Our guest house is now empty and we are getting it ready for the new renters, whomever they may be. It needs a bit of paint and polishing before its ready so we have been busy doing just that everyday this week, after work of course. More of the same planned for us for the New Year weekend, but I plan to fully loaf for at least an hour to watch the Rose parade!
We sure did. It was a weekend full of amazing food, a fun time, and great gifts.
Rory and I enjoyed our 3rd year in a row of our traditional homemade cinnamon rolls for breakfast Christmas morning. Baxter really enjoyed his traditional Christmas breakfast of a Prime rib bone from our dinner the night before.
We opened our gifts, one of which was a Wii from Rory to us! It's so much fun actually and here is a Wii version of Baxter and me.
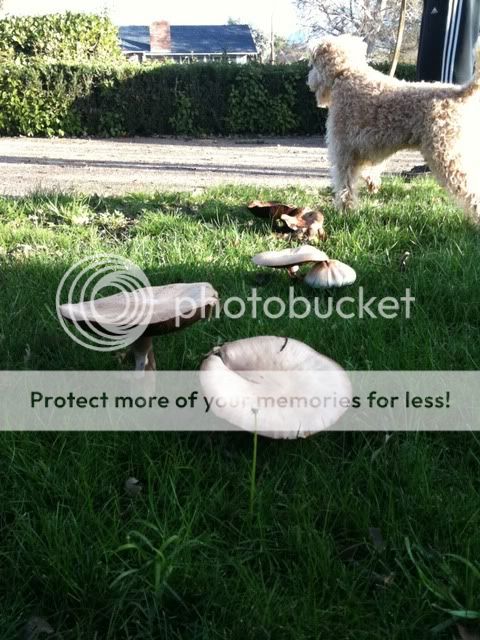
From all the rain these humongous toadstools have been growing on our lawn, this was right as we left for our long morning walk.
The rest of our day consisted of relaxing, eating and another walk. The perfect lazy Christmas day. Hope yours was great as well!
It's the night before Christmas Eve, & I've been cooking most of the day and will be cooking all day tomorrow. In preparation of our traditional overnight cinnamon rolls I have 4 unused egg whites. I made a huge batch of "white cookies" which usually consist of egg whites, lemon zest, sugar and mini chocolate chips. This time I piped them into Christmas tree shapes after I tinted them green for a holiday theme. We sprinkled them with red, white and silver dragee balls as little ornaments. Here they are in the oven slowly cooling, they'll stay here till tomorrow until they harden up all the way.
Oh, I got my Manger! Rory built it right after work, and I just finished up a Shepherd and a little fluffy sheep. And a felted star above the manger leading the 3 wise men to the baby Jesus.
I have been working on getting my felted Nativity set done by Christmas Eve, but with that in just a day I am not sure I'll meet my goal. I still have a shepherd and a wooly lamb to felt, and I also need to build a manger out of something. I have tried to pawn that job off on Rory but it hasn't worked, maybe some bribery will be in order. Here is the latest, I have a Camel (definitely my favorite) a lamb, a donkey, 3 wise men carrying a gift each, Mary, Joseph, and the baby Jesus. I think in the right setting, like faux hay and a wood manger they will really look in place. The large pine cones kind of throw me off, so I'll stage them the right way once it's all done.
My mom sent me this last night and I have to share it. It's the story of The Nativity in a modern twist. It goes fast, so watch close!
I finished 3 animals so far. The lamb of course was my first, the burro next and then the camel. Each getting more and more elaborate. I am now going to start the people, I have 3 wise men, Mary and Joseph, baby Jesus, and possibly a shepherd and an angel. Wish me luck getting those done before Christmas.
***Edited to add! Here is the first person I've felted. I did it last night and he only took me about an hour. So much faster than that Camel!!! He is one of the wisemen with a small chest of gold.
Yesterday Rory finished installing our fir wood mantel he built. He really did a great job building it despite all the tough elements, like the fact that its 9 feet long, curved, huge and the delicate mitered seams. You can't even tell its not a solid piece of wood.
Here is a shot of the inside, its a plywood box with an inch of solid fir wood over it for the outside.
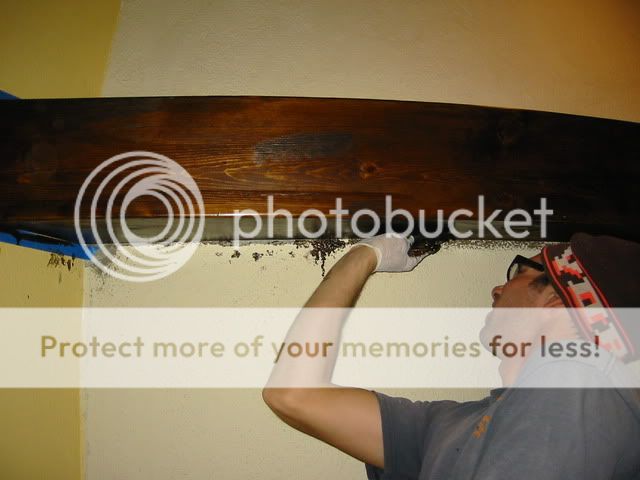
The estimate from the custom woodworker in town was $1610.00 to built it the same way out of Fir. It was going to be $2163.00 out of Walnut. We decided to make it out of Fir from the lumber supply for about $40 with the plywood. We figured stain would do the work to make it look how we envisioned, an old world Spanish beam. So once it was installed and done we got up close and personal distressing it, Rory used his electric wire wheel to speed up the process, we even put in faux termite damage, and the usual dings bangs and scratches.
In a flash it transformed into a dark, and beautifully rich looking beam with just a little bit of walnut stain. We plan to finish it with an old world look using Briwax or a satin varnish tomorrow.
Here it is spills and all, of course we are going to completely resurface the stucco so those spills and test spots will soon be all one color. But doesn't the wood look great?
I know, I know, I need another new hobby like a hole in the head don't I? Well I think I found a really cute one that will hopefully produce a Nativity set before Christmas. Its pretty fast too, needle felting. I saw these adorable little guys on Etsy, and I had to try my hand in it.
Here is my first felted animal, a little lamb.
It's pretty simple really just make a form with pipe cleaners, then add un-spun wool and poke it with special needles until you get the right form. I bought a how to book and the supplies yesterday and had the lamb done in about 2 hours. I plan on starting a 'burro' today.
I may or may not have a little thing for Burlap. You may remember our Holiday decor from our first Christmas in our home last year. I bought a large artificial wreath and garland that I decorated with fresh greens and silver bows. Well this year it's all about Burlap. I made a Burlap tree skirt in January of this year, that I plan to add some "flare" to, so as soon as we get our tree I'll post pic's.
This is the "new" (Craigslist) entry table with the garland I used last year to make a mantel for our fireplace. Since the fireplace is still under construction.... I am using it here. Its the first thing you see in our home so I find it to be the best place to decorate for the seasons.
I added a large burlap bow, and pine cones from down the street, & some fresh cut juniper for fragrance.
Here it is with the lights on!
Our wreath with a new look, a much better sized bow than last year, I think.
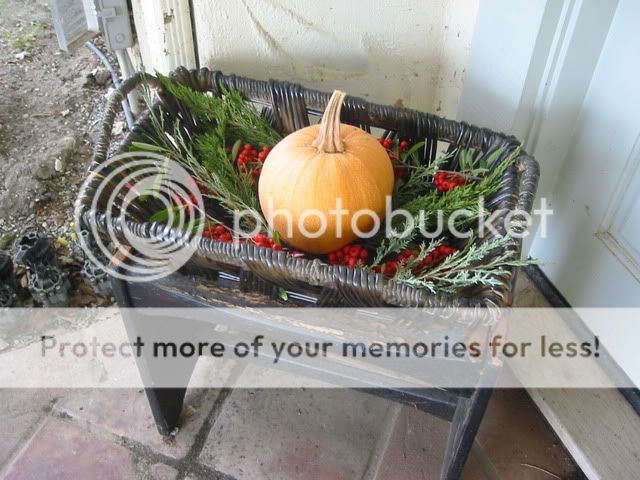
I haven't gotten around to cooking my pumpkins yet, so here is one sneaking into December with a bit of red and green to camo it in. These red berries are Pyracantha, and I was going to use them inside but feared they might be poisonous, so with Baxter I didn't want to chance it. I googled them and they are not, so for now they are outside, but they might make their way indoors.
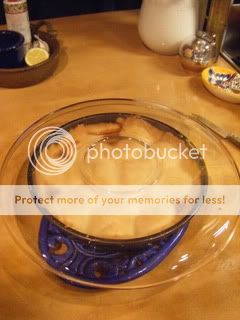
Here is our old entry way table with a pine display. A tall glass vase filled with pine cones and branches, and my favorite trifle dish filled with glittered pine cones. That little sachet bag is filled with ground fir needles and it smells like a little bag of Christmas, its just heavenly.
As most may know, I have a thing for Mexican ceramics. We redid our kitchen to have cobalt blue Talavera tile and our whole master bathroom is covered in it. I have large hand painted Ginger jars from Mexico, and a collection of other little great ceramics all with the same theme. Today I picked up these Anfora plates at a little shop for $3.00 ea. I found these cute little matching pattern (called Blue Pueblo) cups and saucers at Pottery Barn a while back that I display in my cabinet, so I thought they would match perfectly and they happen to be the same manufacturer at that. Anfora ceramics since 1920.
I put them up here on that long empty space above our raised bar. The area always seemed so empty and I had tried other things in the past, like painting on wall words, and that failed. I got tired of explaining to everyone what it meant.
So here they are! They look great in person they are one of the first things you see when walking into the kitchen from our dinning room and then your eye goes over to the cabinet with the matching cups and saucers.
I hope you all have days filled with Family, Food and Joy. I am headed to my parents shortly to put that bird in the oven and prepare the rest of the traditional meal for them. Its a frosty morning here in California, we woke up and its 30 out, about 55 inside. So I'm sitting by the fire and enjoying the calm before the cooking storm. As usual I baked my pies yesterday to save time and oven space for today. I made a new recipe for pecan and my classic apple pie. The pecan pie is a recipe from Bubby's pies in NY. It included great ingredients like molasses, maple syrup and orange liqueur! Yum!
In my post below I made a DIY wreath with beautiful and mysterious wood roses from the tops of pine cones. I had never seen these before so I really didn't know what they were I just knew I wanted to make something out of them.
So I went searching online to find out what they are. Apparently certain types of Cedar trees call Deodar have these thin pine cones that start out like little green eggs and then pop off their tops around late summer.
I was fortunate enough to have one down the street but if you want to make a wreath like mine you can get them online, of course! Dried Cedar wood roses to buy are here. I probably had about a pound and used them all for my small 12" vine wreath. ~Have a Happy Thanksgiving~
Although I am eager to decorate the house with Christmas cheer, I am a firm believer of waiting until after Thanksgiving to decorate. That doesn't mean I can craft! Have you ever heard of a pine cone top? I don't think anyone has, I tried googling it and found nothing on them. Down our street there are some large pine trees that had sprouted bright green pine cones this spring. We walked the dog by daily watching them grow and change over the months. Then one day after they had turned brown and opened up, the tops were popping off, and laying all over the street. They look like little wood roses, and I had to do something with them. We started collecting the pine cone tops 2 months ago, aren't they cool?
I got this grapevine wreath at the craft store.
And these are all the pine cone tops that we collected down the road.
I simply hot glued them on easy peasy.
Then finished off the wreath with a large burlap bow wired on, I made it out of a roll of burlap garland that I picked up at Michael's.
Another quick project that has needed some addressing for a while was our coat rack. This was it this morning. It's was a cheap buy that we picked up years ago. Kind of small, blah and the hooks were really close together. As you can see I hang my giant purse on the hooks and it takes a lot of space.
We quickly put this together out of a piece of a wine barrel that our next door neighbors gave us, they have plenty, and some hooks from the hardware store.
Much better looking and less cluttered, just like that!
Our fireplace has us spinning in circles. I'll post progress on it once we actually decide on a mantel and commit enough to build one. The post below is now on hold. I feel so indecisive, it's amazing because if you know me, I always know what I want and rarely change my mind. So something like this really shouldn't get me hung up, but it has!
After a week staring at our demolition job we started to second guess our decision on our mantel and fireplace renovation. We had originally decided to add a large rustic wood mantel. But some complications finding wood that large and affordable has been a major road block. We have gone over idea after idea on this challenging mantel, and have come to a semi decision to demolish it further. This was it before.
We took the hammer to it here, and we plan to do much more!
We will need to remove the whole top stucco structure, just to sink it back about 6 inches to create a stepped back mantel and hopefully find a 3" wood slab for our mantel top. Something like this.
Tonight Rory and I are invited to a friends new home for dinner. We offered to bring something of course, and they said if I wanted to bring a dessert that they would love it. So the little sugar coated wheels in my mind started turning. I always love to bake and create delicious desserts, and I love to challenge myself with something new. But on a week night after work I only have so much time, so a 9 layer cake is out. I wanted to find a great but also fast and simple recipe using apples as we have an orchard full of them right now. I started searching through my baking books and found this.
This classic French dessert the Tarte Tatin originated in the late 1800's in France, it is basically an upside down apple tart that is cooked in caramel. Yum! It's beautifully rustic, simple and fast! I went online to check it out and what do you know there is even a video of how to make it with Martha and a guest. Perfect.
Here is a great video from Julia Child making a Tarte Tatin, I really enjoy watching her cook, she is more than entertaining. It's a long video, but if you can watch it through to the part where she flips the pan over to unveil the tarte, you won't be disappointed and you will get a taste of her famous optimism. Lets hope that doesn't happen to mine! She did use a mixer for the tarte dough but I used the Martha recipe in which the dough is made quite fast in a food possessor.
I made my Pate Brisee (dough) last night, lickity-split, wrapped it in plastic and stuck it in the fridge to chill overnight. The apples are easily peeled, cored and quartered, not in slices so that was fast. I used Granny Smith apples from my parents orchard. I like the tart flavor of Granny's and the way they hold up in cooking, there are my "go to" pie apple as well.
Well here goes. This is the tarte assembled upside down in the pan with the dough on top as it went into the oven.
Then it cooked for about a half hour and filled the kitchen with the smell of butter, apples and caramel. You have to invert the tarte onto a plate while its still hot, so this is the tricky part. I was a little nervous after seeing Julia's attempt!
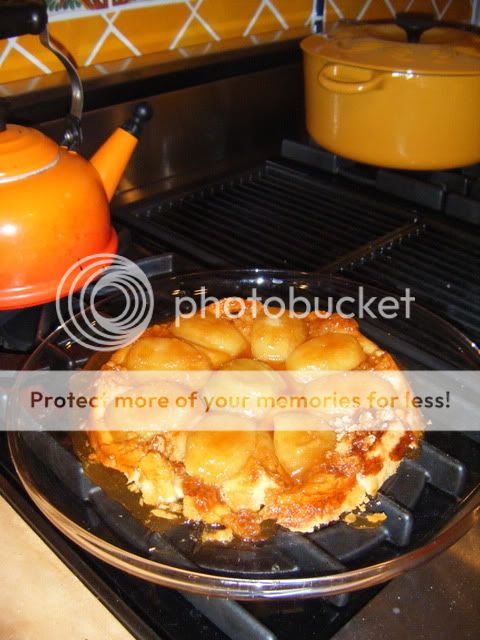
I waited a minute, mainly out of fear that it hadn't detached from the top. Then I got up the courage and lifted the pan.
Voila! Apple Tarte Tatin! It's not perfect, but never apologize, just cover up the boo boo spots with caramel. Off we go to dinner, can't wait to taste it :)
We love creating, no matter what the medium may be. Follow us trying to fix up our home with renovations DIY style, building random needs, painting, creating, and cooking our way through life. Hopefully there is time for fun in here somewhere :)


