As most may know, I have a thing for Mexican ceramics. We redid our kitchen to have cobalt blue Talavera tile and our whole master bathroom is covered in it. I have large hand painted Ginger jars from Mexico, and a collection of other little great ceramics all with the same theme. Today I picked up these Anfora plates at a little shop for $3.00 ea. I found these cute little matching pattern (called Blue Pueblo) cups and saucers at Pottery Barn a while back that I display in my cabinet, so I thought they would match perfectly and they happen to be the same manufacturer at that. Anfora ceramics since 1920.
I put them up here on that long empty space above our raised bar. The area always seemed so empty and I had tried other things in the past, like painting on wall words, and that failed. I got tired of explaining to everyone what it meant.
So here they are! They look great in person they are one of the first things you see when walking into the kitchen from our dinning room and then your eye goes over to the cabinet with the matching cups and saucers.
I hope you all have days filled with Family, Food and Joy. I am headed to my parents shortly to put that bird in the oven and prepare the rest of the traditional meal for them. Its a frosty morning here in California, we woke up and its 30 out, about 55 inside. So I'm sitting by the fire and enjoying the calm before the cooking storm. As usual I baked my pies yesterday to save time and oven space for today. I made a new recipe for pecan and my classic apple pie. The pecan pie is a recipe from Bubby's pies in NY. It included great ingredients like molasses, maple syrup and orange liqueur! Yum!
In my post below I made a DIY wreath with beautiful and mysterious wood roses from the tops of pine cones. I had never seen these before so I really didn't know what they were I just knew I wanted to make something out of them.
So I went searching online to find out what they are. Apparently certain types of Cedar trees call Deodar have these thin pine cones that start out like little green eggs and then pop off their tops around late summer.
I was fortunate enough to have one down the street but if you want to make a wreath like mine you can get them online, of course! Dried Cedar wood roses to buy are here. I probably had about a pound and used them all for my small 12" vine wreath. ~Have a Happy Thanksgiving~
Although I am eager to decorate the house with Christmas cheer, I am a firm believer of waiting until after Thanksgiving to decorate. That doesn't mean I can craft! Have you ever heard of a pine cone top? I don't think anyone has, I tried googling it and found nothing on them. Down our street there are some large pine trees that had sprouted bright green pine cones this spring. We walked the dog by daily watching them grow and change over the months. Then one day after they had turned brown and opened up, the tops were popping off, and laying all over the street. They look like little wood roses, and I had to do something with them. We started collecting the pine cone tops 2 months ago, aren't they cool?
I got this grapevine wreath at the craft store.
And these are all the pine cone tops that we collected down the road.
I simply hot glued them on easy peasy.
Then finished off the wreath with a large burlap bow wired on, I made it out of a roll of burlap garland that I picked up at Michael's.
Another quick project that has needed some addressing for a while was our coat rack. This was it this morning. It's was a cheap buy that we picked up years ago. Kind of small, blah and the hooks were really close together. As you can see I hang my giant purse on the hooks and it takes a lot of space.
We quickly put this together out of a piece of a wine barrel that our next door neighbors gave us, they have plenty, and some hooks from the hardware store.
Much better looking and less cluttered, just like that!
Our fireplace has us spinning in circles. I'll post progress on it once we actually decide on a mantel and commit enough to build one. The post below is now on hold. I feel so indecisive, it's amazing because if you know me, I always know what I want and rarely change my mind. So something like this really shouldn't get me hung up, but it has!
After a week staring at our demolition job we started to second guess our decision on our mantel and fireplace renovation. We had originally decided to add a large rustic wood mantel. But some complications finding wood that large and affordable has been a major road block. We have gone over idea after idea on this challenging mantel, and have come to a semi decision to demolish it further. This was it before.
We took the hammer to it here, and we plan to do much more!
We will need to remove the whole top stucco structure, just to sink it back about 6 inches to create a stepped back mantel and hopefully find a 3" wood slab for our mantel top. Something like this.
Tonight Rory and I are invited to a friends new home for dinner. We offered to bring something of course, and they said if I wanted to bring a dessert that they would love it. So the little sugar coated wheels in my mind started turning. I always love to bake and create delicious desserts, and I love to challenge myself with something new. But on a week night after work I only have so much time, so a 9 layer cake is out. I wanted to find a great but also fast and simple recipe using apples as we have an orchard full of them right now. I started searching through my baking books and found this.
This classic French dessert the Tarte Tatin originated in the late 1800's in France, it is basically an upside down apple tart that is cooked in caramel. Yum! It's beautifully rustic, simple and fast! I went online to check it out and what do you know there is even a video of how to make it with Martha and a guest. Perfect.
Here is a great video from Julia Child making a Tarte Tatin, I really enjoy watching her cook, she is more than entertaining. It's a long video, but if you can watch it through to the part where she flips the pan over to unveil the tarte, you won't be disappointed and you will get a taste of her famous optimism. Lets hope that doesn't happen to mine! She did use a mixer for the tarte dough but I used the Martha recipe in which the dough is made quite fast in a food possessor.
I made my Pate Brisee (dough) last night, lickity-split, wrapped it in plastic and stuck it in the fridge to chill overnight. The apples are easily peeled, cored and quartered, not in slices so that was fast. I used Granny Smith apples from my parents orchard. I like the tart flavor of Granny's and the way they hold up in cooking, there are my "go to" pie apple as well.
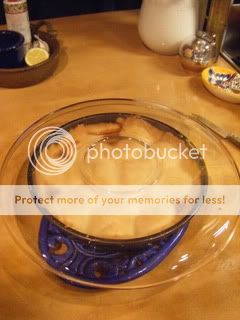
Well here goes. This is the tarte assembled upside down in the pan with the dough on top as it went into the oven.
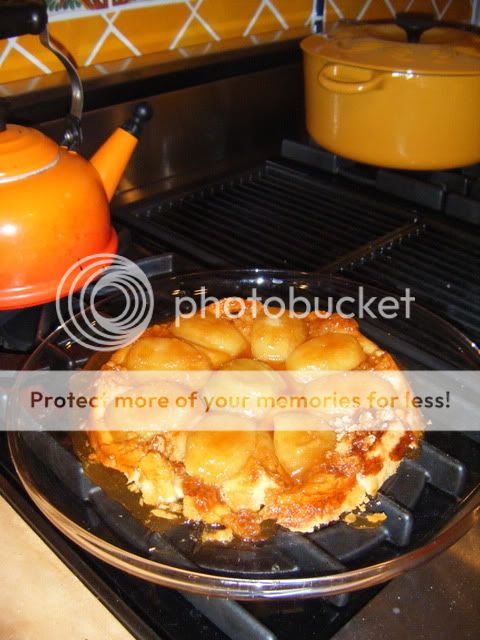
Then it cooked for about a half hour and filled the kitchen with the smell of butter, apples and caramel. You have to invert the tarte onto a plate while its still hot, so this is the tricky part. I was a little nervous after seeing Julia's attempt!
I waited a minute, mainly out of fear that it hadn't detached from the top. Then I got up the courage and lifted the pan.
Voila! Apple Tarte Tatin! It's not perfect, but never apologize, just cover up the boo boo spots with caramel. Off we go to dinner, can't wait to taste it :)
Yesterday my mom and I went shopping to celebrate her Birthday!! Although the day was not too fruitful in the way of great finds, I did come home to something exciting :) Rory worked on our mantel, well after he made a trip to Home depot and splurged on some nice new and much needed tools to accomplished building this ourselves. You see we got a quote from a local custom wood worker to see what it would cost to job out our mantel. Well that was not quite realistic, so we passed and decided to give it the good ol' DIY try.
While I usually have my hand in most of the projects we have done, this one has me a bit bewildered. For some reason I just can see how it's going to work, and Rory seems confident enough to do it. He is going to make a faux wood beam mantel. We had originally decided that a solid mantel would be nicer but the weight of it, and cost of the wood was too much, not to mention the waste of hardwood is not very environmentally friendly. So he is building a plywood base and is going to put up a thick (probably 1 inch) veneer walnut box over that.
This is what it looked like before.
Then with a bit of this...
We knocked off the useless round stucco mantel.
And my mock up via Photoshop of what we hope to accomplish.
Well this is where we are, today. Rory anchored one long piece of plywood around the curve into the brick that was underneath the stucco with 6 large bolts. Then he attached those smaller pieces of plywood to kind of make the skeleton of the box... geez I really have no idea what to call this technique. I think he should be writing this blog post.
Currently he is cutting out the plywood box to go over this. I'll update that later when he is done. Wish us luck on this renovation, and if you know what he is doing please explain it to me!
(Update) While Baxter was doing this. He looks uncomfortable doesn't he?
Rory was installing this.
Here you have our plywood mantel. Rory built this box as the hollow structure that will have the finished hardwood veneer attached to it. Now to buy some wood, which will we choose?
Today is Baxter's Birthday, and I can't believe he is five!! That flew by. As you may know Baxter is our little boy and we on occasion have been known to spoil him. When we lived in town he used to frequent the pet store at least once a month, and usually leave with a new toy. He went through them quickly, as soon as the squeaker is destroyed then he rips them apart. Well since we moved far away from the "toy store" he hasn't been there much at all. So for his special day we took him in and sure enough he picked out a new toy to take home.
This little video montage will give you a glimpse of what we have been dealing with for the last 3 hours straight. He is so happy!
We love creating, no matter what the medium may be. Follow us trying to fix up our home with renovations DIY style, building random needs, painting, creating, and cooking our way through life. Hopefully there is time for fun in here somewhere :)