Thursday, December 29, 2011

New Rug!

I swore I would never order a large item via internet for our home without seeing a sample or something, but I took a chance and I'm happy I did! Plus, RugsUSA.com was having this epic facebook sale and I got this rug for 50% and no shipping.

This was our living room rug before. It was a nice Persian style wool rug hand-me-down that was neutral enough, but I wanted something a bit more modern.


New rug!!!
I ruv it. It looks pretty blue in these photos but its actually a charcoal color, either way it works!


I love the texture, it's wool but it's a loop pile. It feels so good on the feet, like little plush nubbies.


Yay new rug!


Monday, December 26, 2011

Picture Wall

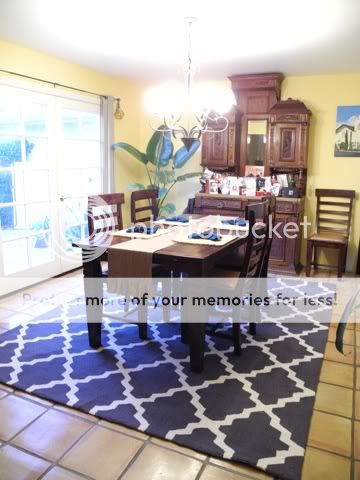
We had a hallway that was in need of dressing. You can see half of it below between the white sofa and the white cane chair.
I of course forgot to take a close up of the naked hallway before I masking-taped out my photo wall. So imagine a hallway wall with nothing on it, but the thermostat, the fire alarm and the door bell speaker thing....really attractive sounding, eh?


The spark for this day after Christmas decor job was actually because of Christmas. Mr. B's dad came over last night for our holiday dinner and gave us a few photos he had taken. He matted and framed them in his handmade barn wood frames, which I love.

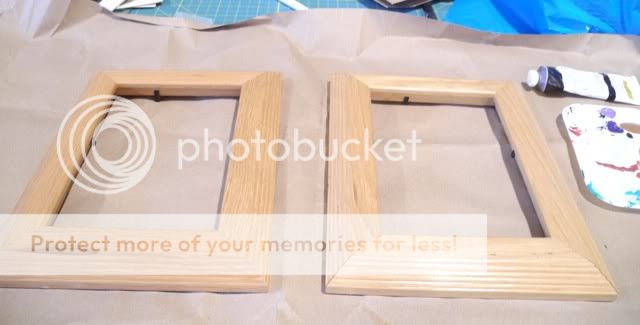
Now these frames below that we had, although they are really nice solid wood they are not my style. Light Oak is just not a wood that goes with anything in our home. So I painted them quickly with a brush and some acrylic.


Here is my, "oh yeah I forgot to take a picture before Mr. B starts hanging pictures" shot.
Note I used the masking tape technique to map out the placement of the frames. I highly recommend this, it sped up time tremendously and there was no need to have Mr. B hold them up so I could see the placement.


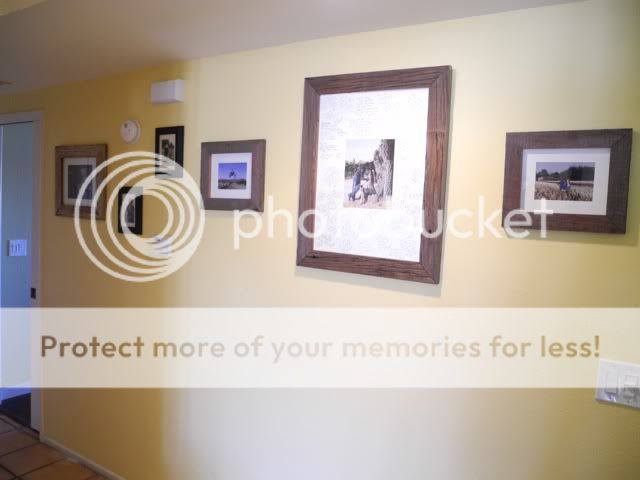
Here is our hallway 1 minute later! I may add more pictures down the road as we grow our frame collection.


Here is the view when walking toward the bedrooms.


**updated I added a few more things tonight 12-27-11


View from the sitting room.


And here it is walking towards the living room and front door. It really seems much more "homey" now. I also think it looks more complete and somehow makes the space seem bigger? Weird right?


Glad we finally did something with that wall space! Just takes a little gift, or inspiration sometimes to get the fire burning.


Sunday, December 11, 2011

Mistletoe Kissing Ball

I was inspired to make my kissing ball after I saw this link on Pinterest. Although my faux mistletoe technique was totally different from the link I posted, I still made use of the felt material to make mine.

Materials used:
1 Grapevine Ball 6"
Cream ribbon
5 squares cheap felt (synthetic) in pale green
1 square wool felt in leaf green
bag of mini white pom poms
hot glue
wood roses (I collect mine down the street)


I didn't take any photos of "how to" steps....sorry. I was on a crafting buzz after getting back from Michaels, Walmart and the Yarn Store!
To make it, I basically cut out a bunch of mistletoe shaped leaves from the felt, hot glued them to a grapevine ball, and then added few white pom poms. I filled some of the empty spaces with my wood roses, because, well I have about 8 pounds of them & I think it breaks up the green nicely with some contrast.
I looped the ribbon through one of the vines and hung it from a hook, pretty easy right? Make one! You'll love it :)


I just happened to hang it in the walkway between our dining room and living room, so Mr. B can't miss it!


Happy kissing!

Other great tutorials on Mistletoe Kissing Balls here!
Martha Stewart Live Mistletoe Ball & Silk Kissing Ball


Saturday, December 3, 2011

Perry, the cardigan

The project that has been taking up the last 2 months of my free time, is now finished! Meet my new cardigan named "Perry"
Here is the pattern by Michele Wang at Brooklyn Tweed dot net.
Here I am wearing mine!
Please excuse the no makeup, undone hair, and dark circles under my eyes. If you know me personally, you know I don't wear makeup, so for this shoot I may look a bit pale and scary, and I apologize. Next time I take photos of myself for this blog I think makeup is a must!


Note that the skill level is a 2 out of 5. This was by far the hardest pattern I have even done, and I was only able to because of the step by step class I have been taking for it. I have been going to a Saturday morning class every two weeks just to learn how to do the math involved and steps for knitting a garment like this.


It's super comfy to wear, and soft! (Sorry Brooklyn Tweed's Wool Shelter is so itchy to me) I knitted it out of Canopy worsted. It's a 50% Baby Alpaca, 30% Merino, & 20% Bamboo blend, in Sarsaparilla color.


Here is my, Mr. B is in the Garage and I can't wait for a photo of me wearing it, shot.


This is a good shot of the lace detail on the bottom edge. I did it a bit differently than the pattern, not intentionally at first but I liked the look after I noticed.


I am really proud of myself for finishing the sweater. It was a huge project, but I learned so many essentials from the class, and now I can say I have made a real garment. Not just a hat or scarf!


Related Posts with Thumbnails